

I ran out of propane Friday night, while continuing to need to run a heater in June. Fortunately, the Transit’s regular engine heater warms up fast and throws out a lot of heat, which a fan or two spread evenly throughout my living space. That’s always a backup option. But my diesel heater arrived almost a week ago, and has been waiting to go in until the rain stopped. That never happened, but rather than fill up my 20lb propane tank, then lug it around mostly full and rarely used, it was time to install the diesel heater despite the weather.
This will not be a how-to article. There are countless articles and videos already out there about how to install these heaters, which are basically all the same. I needed to get this finished to get some heat back in the van, so I didn’t take detailed pictures of the entire procedure. But I’ll mention my experience, the issues I ran into, and how I got around them. Spoiler alert: So far, after some initial teething troubles, it’s working great.

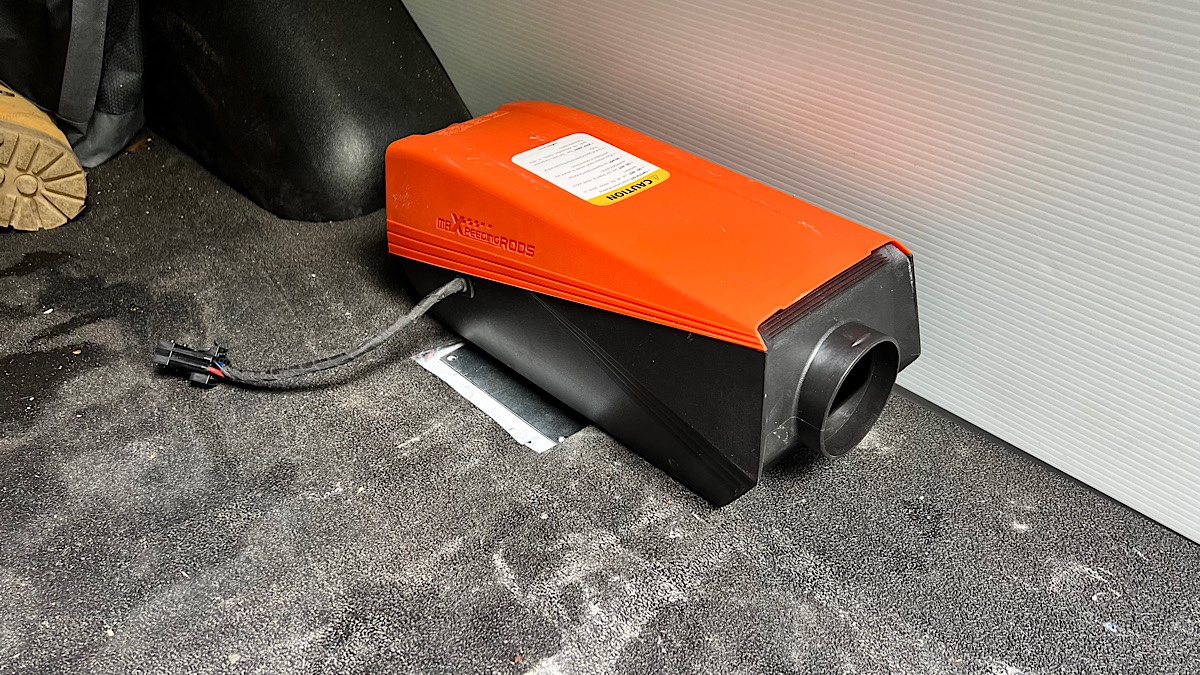
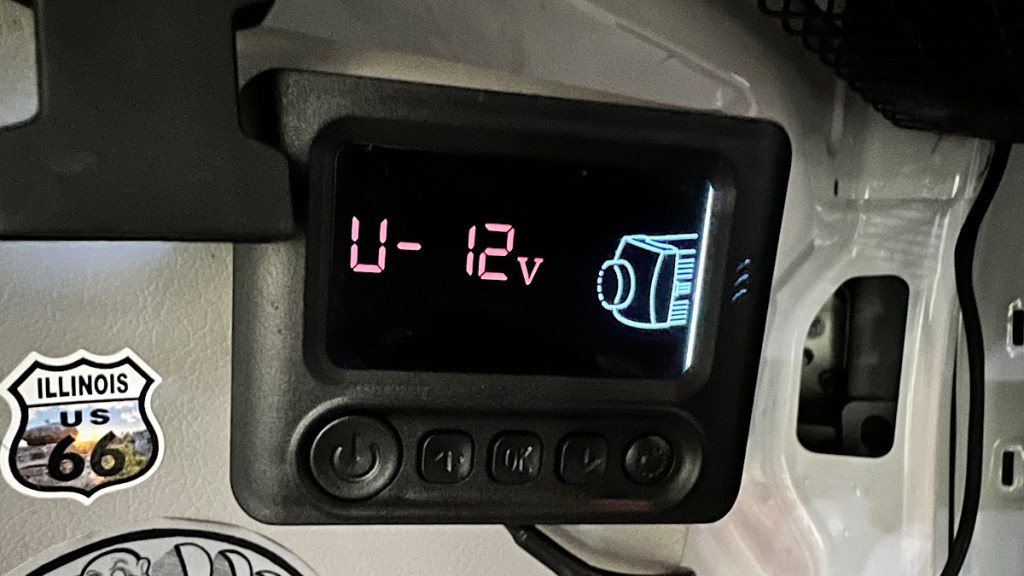
The first step was unpacking the box of bits and pieces. I got the Maxpeedingrods one off Amazon, mainly because of the generally positive reviews, and the fact that it allegedly automatically detects and adjusts for altitude (their version 2.0 heater). Some of these heaters don’t work above 6,000 feet, and I’ve already spent a bit of time in places higher than that, so that seemed a feature worth having. In the top picture, you can see its altitude readout of 391 meters, which is about 1,200 feet and correct for where I am right now. All this for $145, which is impressive considering that an Olympian Wave 3 propane heater now runs for more than double that price. The “real” heaters by Webasto, Espar, etc. cost more than $1,200.
Surprisingly for “cheap Chinese junk,” all of the parts I needed were there. That’s never a given, and manufacturer support for these things doesn’t exist. The instruction manual, though not detailed enough for me, was written in rather good English. (And German, but since I don’t know that language I can’t say how good it was.) I’d watched several YouTube videos showing various methods to install it, and had a pretty good idea what I wanted to do. I rearranged the back of my van, folded up the bed since I planned to put the heater under it, and started test fitting everything.


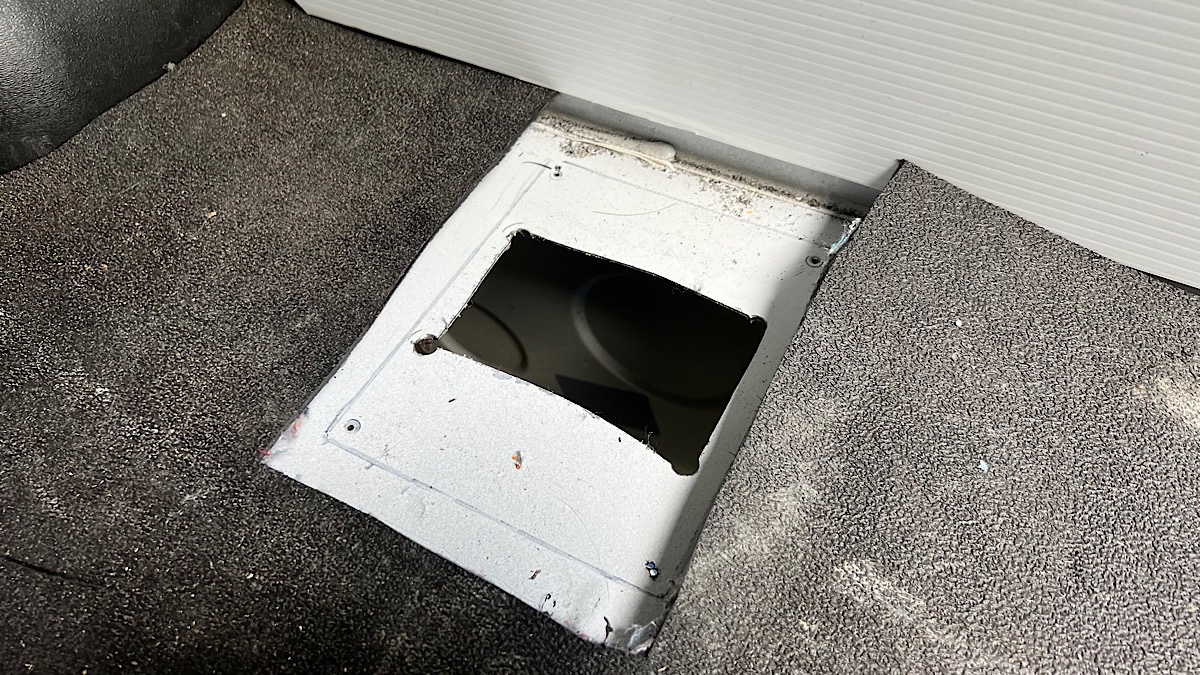
The heater itself bolts to a mounting plate, which, in turn, attaches to the floor. Some people use a specialized mounting turret that replaces this plate, but I used Adventure Van Man’s method of marking everything on the floor, then cutting a hole large enough for all the stuff to fit through, but smaller than the mounting plate to ensure a good seal. Once again, it was hard to cut a hole in my shiny new van, but I did it anyway, knowing the end result would be worth it. I also cut a notch in the rubber floor slightly larger than the mounting plate, both for access and to make sure it wouldn’t melt from the heat.
These heaters have an air intake, exhaust pipe, and fuel line that connect from the outside. That’s the main advantage of this type of heater — all of the combustion uses outside air, not air from inside the vehicle. That makes it safe to run overnight, since there’s no risk of running out of oxygen and just not waking up like there is with the propane heater I’ve used. I simply turned it off overnight, but then woke up to a cold van that took a while to heat up again. Because all of these heaters, regardless of brand, copied the expensive Espar and Webasto design the moment their patents expired, the units themselves are basically interchangeable. If I need to replace this cheap heater later, the new one will go right where this one is — even the expensive one.


The exact location I used fits perfectly in a small area between “frame” rails underneath the van, just big enough for the mounting plate. As a bonus, the heater’s exhaust pipe dropped down right next to the engine exhaust pipe. I attached the heater’s muffler, then attached both exhausts together to blow out the side. I know the muffler should hang closer to vertical in a perfect world, but the weep hole for condensation is still at the lowest point. It would’ve hung lower than the engine exhaust pipe if it was perfectly vertical, and I didn’t want to risk it getting ripped off due to its lower ground clearance.
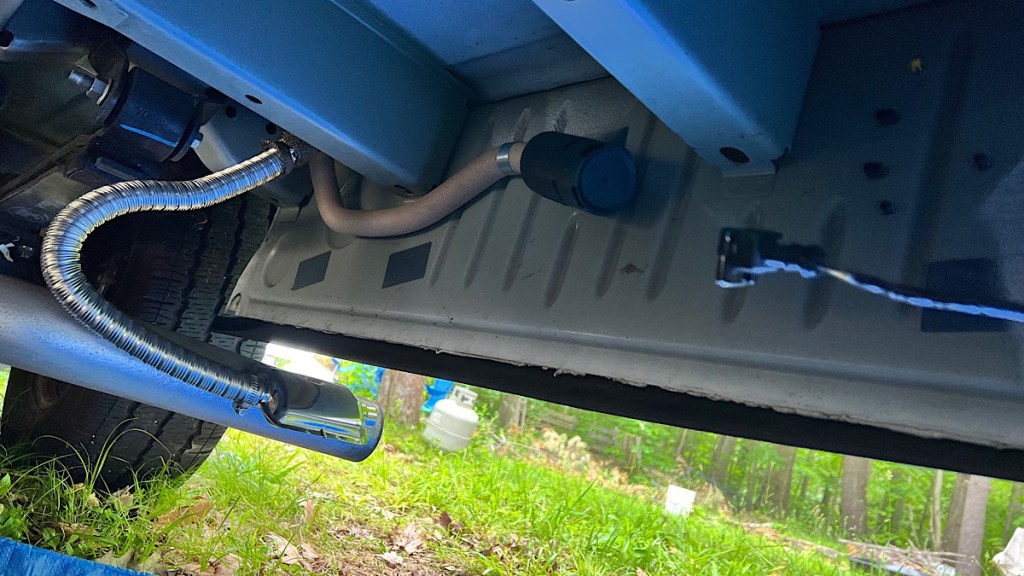
Here’s how it looks underneath. The brown tube is the air intake, and the black cylinder on the end is an air filter. The wiring harness on the right goes to the fuel pump, which I’ll install later.

The kit includes a nine-liter diesel tank, which I bolted to the inside of one of the back doors. This way I can still fuel up outside the van rather than in my living space. In fact, when I filled it up after the installation, I simply drove up to a diesel pump and filled it directly from that. I plan to buy a yellow diesel fuel can to keep in the trailer for instant refills if I run low. The cap has a good rubber seal, so I don’t smell diesel inside the van.
Everybody says to throw away the green fuel line that comes with some of these kits. I used it anyway, because I had no heat and needed to get this system up and running. I may replace it later once I do some research and find out what works better. Unlike many kits, the tank in this one has a pre-threaded outlet at the bottom to screw the fuel tap onto. Many kits make you drill and install one yourself, so I appreciate having one less thing to mess up and cause a fuel leak.
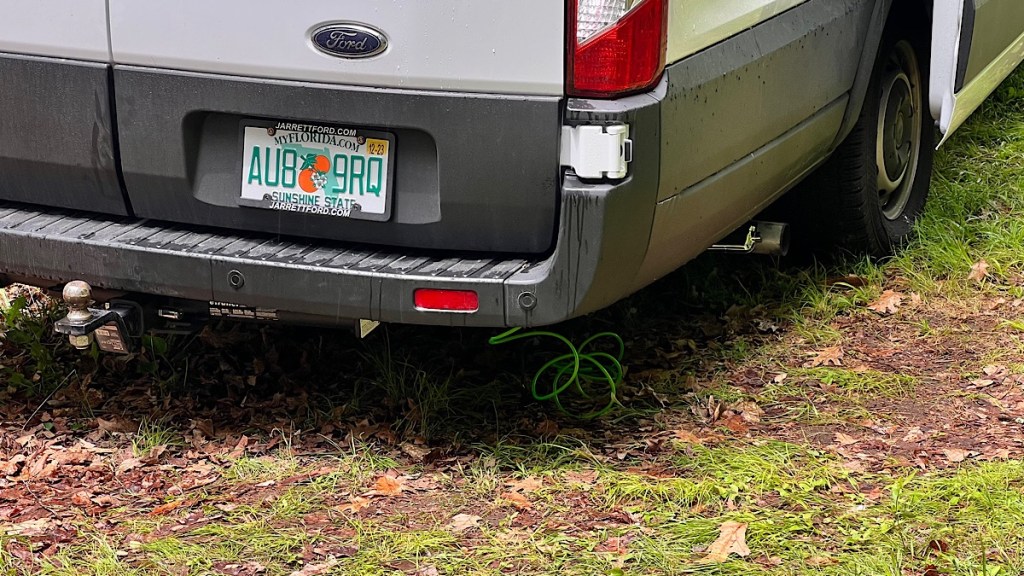
Just like I did with the shore power outlet and trailer light wiring, I ran the fuel line (and fuel pump wiring) out the bottom of the van by slicing a slit in a rubber grommet that covers a hole that already exists there. Then, of course, the sky opened up, forcing me to pack things up quickly and retreat inside the van for about an hour or so with a fuel line hanging out the back.
Fortunately, my tools and the remaining parts were under Ally’s pop-up, which has been a life saver during the non-stop rain New Hampshire has had this June. After the rain stopped I finished installing the fuel system as quickly as I could, before it rained again. I didn’t take any pictures to save time, but I got a good run from where the fuel line exits the van, through an included filter, to the fuel pump (angled up as per the instructions), and then a continuous ascent all the way to the heater itself. I ended up wrapping the fuel line around the intake pipe to help keep it away from the hot exhaust. I need to go back and add some wire loom or something to protect the fuel line from getting damaged or punctured, but I can easily do this later. Right now, I just needed to get it working.
The last part was the wiring. The heater includes a harness that supposedly has everything you need. The control unit doesn’t come with any way to mount it, so I used some double-sided foam tape to stick it to my old headliner, which is now my wall covering next to the bed. I ran 14-gauge wire all the way from the harness to my main fuse box, stuck in a fuse, and it came to life.
The next step was to prime the fuel system, which there’s a function for in the control unit. After that, it was time to fire it up and see if it worked. It didn’t. When the glow plug ignited, the voltage dropped significantly, and I got an E-01 under voltage error. My batteries were fully charged and putting out more than 14 volts, so I knew they weren’t the problem. A little research online indicated that the 14-gauge wiring I used, which is also what the included wiring harness uses, wasn’t enough for the 13 amps of power the glow plug needs during startup. (This goes down to about three amps after it a few minutes once the glow plug is no longer needed, so it’s not a huge continuous draw on the battery.) It can handle the power safely, but the voltage drop is too great, especially since I have a long run from the left front to right rear corners of the van.
This isn’t the first time I’ve had a wiring harness that didn’t work well enough and I had to upgrade. When I installed a heated seat kit in my Subaru BRZ, the harnesses had terrible wiring with many bad connections. I ended up rebuilding these harnesses with thicker, better wire and reusing the connectors and components that came with the kit. While the controller and fuel pump wiring were working fine, it looked like I had to replace the included power wiring.
I remembered I had the thick solar cables I used to plug my external solar panel (now bolted to the roof of Smokey II) to the charge controller in my trailer, which I’m no longer using. I removed that cable and ran it along the floor of the van to connect the batteries directly to the heater’s power wires (with an inline fuse, of course). Then I tried it again. There was still a voltage drop when the glow plug lit, but it barely dropped below 12 volts for a second, then came right back. That solved the problem.
It then took several attempts to get the heater to fire. I kept getting a generic E-10 error, which basically means it tried to fire and failed. The most likely cause was either air bubbles remaining in the fuel line, or that I flooded the combustion chamber during priming. Either way, there was nothing for it than to keep trying until it cleared up and fired. That’s exactly what the internet said to do, in fact. I scrolled through the menus to monitor the combustion chamber temperature, and eventually it started to increase rapidly as it finally ignited. Hot air soon came out of the vent, which I set up to blow out from under the bed. (I also turned on the roof vent in “ceiling fan” mode, with the vent closed but the fan running slowly for extra circulation.) Before long I had to turn the temperature down because it was getting quite warm inside the van. This was with the heater on its two kilowatt setting. It will go up to five kilowatts, but for a space this size it’s not necessary, and uses less fuel this way.
It took me all day to get to this point, especially with the troubleshooting, but it was done. I have good dry heat in the van that’s safe to run while I’m sleeping, so I never have to wake up cold again. I did the bare minimum of cleanup, heated up leftovers for dinner, and settled in to watch Fast X. (It was precisely as utterly ridiculous as I expected it to be.) When it got a little chilly in the van, I turned on the heat and stayed nice and toasty. I enjoyed going to bed without having to bundle up in multiple layers. In fact, partway through the night I even turned the heater off because it was getting uncomfortably warm, even though I’d set the temperature to 15ºC, or about 60ºF, a decent temperature for sleeping. My insulation retained enough heat until I got up this morning, to the first warm, sunny day we’ve had in a long time. I’m sure this happened because I installed the heater yesterday. You’re welcome, New England. That was me.
I still have a bit of cleanup to do, partly in the van, but mostly in the trailer, where I kept shuffling stuff around to get to my tools, this, that, and the other thing. But the rush to get a working heater in my van is over. It’s done. Now I can clean up my mess in the trailer, and work on sorting what’s left so I can get back on the road at the end of the week. I’m on a deadline, but I’ll make it. I’ve made a lot of my big bulky items go away at this point, and made plans for others. Although it doesn’t look like it just yet, I’m making excellent progress on sorting through stuff from my storage unit. There may even be time for an extra credit project before the end of the week.

Hi, I see you were/are in New Hampshire, as I am. I recently bought a used van from someone that has a diesel heater. I’ve read I should clean it before winter etc. Do you know of anywhere local-ish I could do this? Thank you!
LikeLike
Sorry I missed this until now. Cleaning every year or two isn’t a bad idea, but I don’t know anywhere in NH for that kind of service. While I just happened to be visiting NH when I installed my diesel heater two years ago, that was also the last time I was there. If the heater has always been allowed to run its full warm-up and cool-down cycles, it tends to stay pretty clean, but since you just bought this van from someone else, you don’t know if that’s been done or not, so it wouldn’t hurt to check if you’re able to.
LikeLike
thanks for your reply! I’ve actually sold the van. Though I did read it’s a good idea to run it on high for an hour or so once in a while to burn stuff off? Who knows?
LikeLike