

I cut and installed my last two pieces of polyiso this morning. I even punched a couple of holes to mount the original cargo area lights. When I eventually put in a real ceiling I’ll punch matching holes to mount them there, too, but for now, this will work. I have a little bit of wool left, so I’ll end up stuffing a bit more into the nooks and crannies in the side walls until I use it all up. That’s easy and doesn’t even really feel like work.
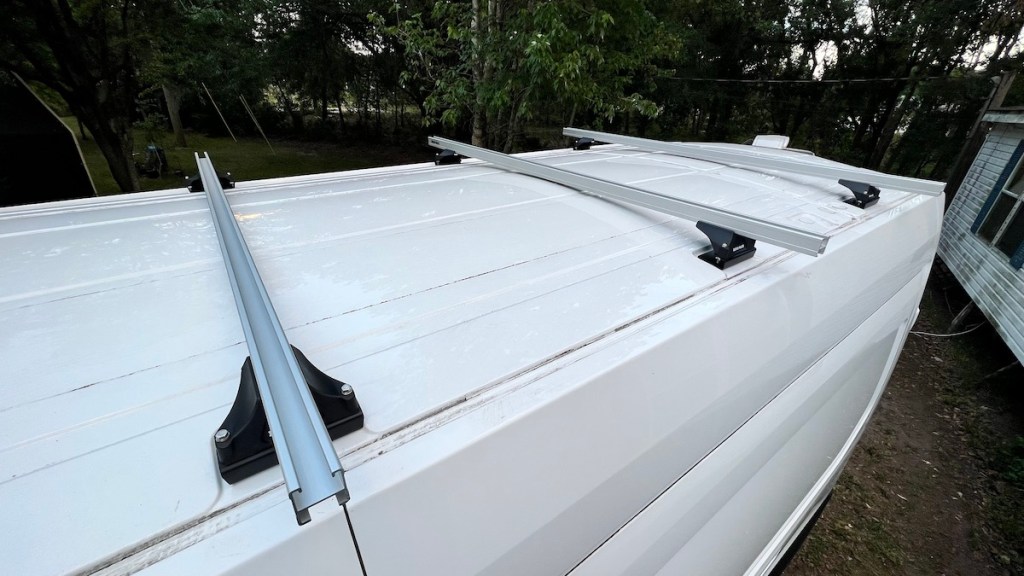
When the temperature dropped last night, I took a bike ride to a nearby Ace Hardware, found some longer stainless steel bolts than Home Depot had, and they worked. My roof racks are on, and they’re solid. I can grab any of them and shake the entire van. Unfortunately, I got the wrong hardware to slide into the channels to get bolts sticking up to mount my solar panels, so that will have to wait until I get the right parts. That mistake is on me. I’m going back and forth with eTrailer right now about my missing end caps (it turns out four out of six fell out of the boxes during shipping), and they’re also the cheapest place I found to get this hardware as well, so maybe I can order the bolts and have them include the end caps in the same order.
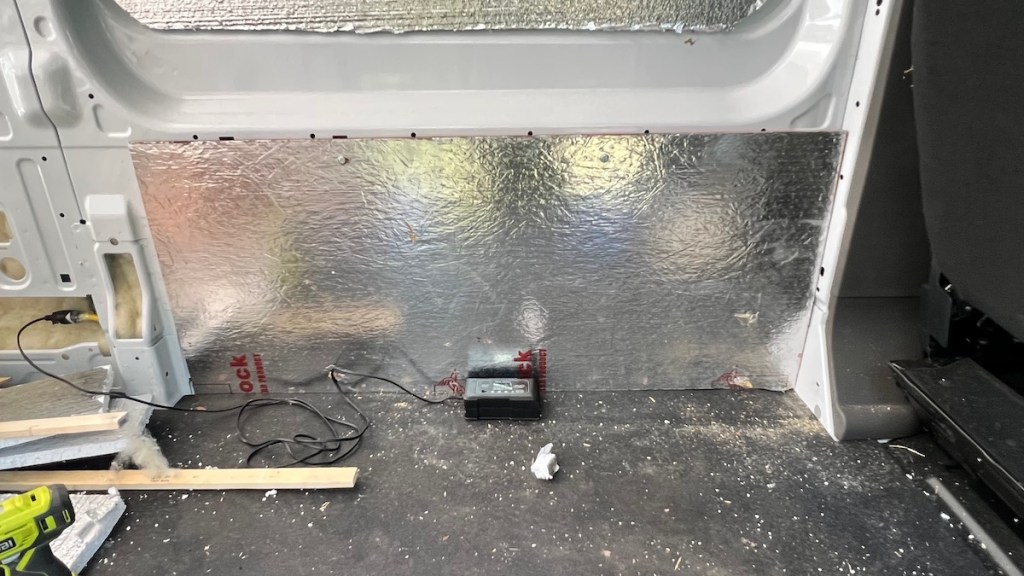
I’ve moved onto thinking about the new van’s electrical system. My uncle has a whole bunch of OSB plywood he got for free and offered to share it with me. One particular scrap just needed a few inches trimmed off to fit perfectly behind the driver’s seat. I used two pre-threaded holes in the side of the van to bolt it into place.
I’m not going to use this throughout the whole interior. It’s pretty heavy, and not the greatest quality stuff. I just needed a solid piece of plywood to mount my electrical components — charge controller, fuse panel, DC-DC charger, etc. Normally I wouldn’t use this kind of plywood, but it’s already here, and it’s free, so why not? Eventually, I’ll have my electrical system covered up anyway, so this doesn’t have to look pretty, just hold stuff in place. I’ve already removed my 20-amp battery charger from the old van and have it ready to install here just as soon as I move a battery or two over.
Another thing I moved over from the old van was the fully automatic Maxxair fan. I just installed it two months ago, so instead of buying another identical one for the new van, I bought a cheaper fully manual one to fill the hole in the old van’s roof. I’ll use that fan’s mounting hardware in the new van to keep the nicer fan for myself. Swapping them out involved just four screws and splicing two wires together for the fan, super easy.
I took a quick bike ride to General RV to pick up lap sealant and butyl tape for the roof vent install in the new van. They had exactly what I needed and treated me well. I’m a bit apprehensive about cutting a 14×14 hole in the roof of my brand-new van! I have to keep reminding myself that I’ve successfully installed two of these vents in the old van with absolutely no leaks, so I can handle this. It’s just a little nerve-wracking. I’ll have to tackle this fairly early one morning before the sun is high enough to start beating down on me.

Instead of messing around with Reflectix, I bought these window covers made specifically for the Ford Transit. They fit perfectly. They’re even black on the other side if I want to bring in heat in the winter rather than repel it, or for general stealth purposes. Since they fill the whole side window, they block the vent, but they’ll still be useful. Since I also have a curtain behind the seats, I don’t need to completely block the windows if ventilation is more important. I still have some spare Reflectix, so I can cut out covers for the side and back windows if I find I need them to reflect more sun and heat out.
With the wrong roof rack hardware, I can’t install the solar panels yet. Fortunately, that’s not a showstopper. I’ll want to move my batteries from the old van to the new one as soon as the roof vent is installed so that I can start using the fan and hopefully make my work area a bit more tolerable in this heat. As parts continue to trickle in I should have the basics of an electrical system installed this weekend, including the roof vent. At that point, I’ll probably pause, do some serious cleanup, and start thinking about what the next steps should be.

Great post
Great job on all the progress you’ve made so far! It’s impressive how resourceful and creative you’re being with the materials you already have. Good luck with the roof vent install, and keep up the great work!
Eamon O’Keeffe
Great DIY Ideas
LikeLike
Thank you! The roof vent install went well. It’s raining hard this morning, and there are no leaks inside.
LikeLike