
Or: How Not To Let the Magic Smoke Out
Aside from the van itself, the most important aspect of this van build is its electrical system. Both of us (because we built this for two) make our living online, and having an adequate electrical supply to power our laptops, phones, and hotspots was critical for living and working full-time on the road. Fortunately, as an amateur radio operator for more than 30 years, I know my way around volts, amps, and watts. I learned the relationship between them to get my radio license. Now I found new ways to apply that knowledge and experience by designing and installing Smokey Da Van’s entire house electrical system. Here’s how I did it.
Plotting and Planning
Before cutting any wires or buying a single component, I had to figure out how robust an electrical system we needed. It was clear that we couldn’t get away with just running off the vehicle battery. Long before van life I’ve depleted a starter battery just by running a ham radio for several hours without the engine running.
I can’t say enough great things about Will Prowse. Between his website, his YouTube channel, and his book, I was able to expand my knowledge to areas I’ve never dabbled in before, like batteries and solar panels. He does a great job explaining these sometimes difficult concepts in terms a layman can understand. I rate myself somewhere above a layman and below an expert like him. His explanations of concepts for the layman match my existing knowledge of them, which is how I can tell he knows his stuff.
Telling you how to design your own electrical system is beyond the scope of this article. I’d recommend reading Mobile Solar Power Made Easy by Will Prowse, or reading his website and watching his videos if you don’t feel like buying the book, to learn how to make your own decisions about what’s best for your build, your needs, and your budget. In this article, I’m going to tell you what I did and why.
Batteries

These are the hub of your electrical system. You charge them up, and you run them down, but this is where the rubber meets the road when it comes to exactly how much power you’ll have to work with. Buy too small a battery, and you’ll run out of juice partway through the night. Buy too big a battery, and you’ll be spending money you don’t need to spend, plus it’ll take longer to charge.
Our goal was to be able to get through a worst-case scenario of three days of normal electrical usage, without solar power, and without the engine running (we’re able to charge from both — more on that later). We calculated the approximate electrical needs of everything we planned to run — the refrigerator/freezer, the roof fan, two laptops, multiple phones and other devices charging — and estimated that we’d need around 200 amp hours of usable battery to make that goal.
We ended up buying two Renogy 200 amp hour AGM batteries. Yes, lithium batteries are better in every way. They’re lighter than AGM, and you can actually use nearly all of their capacity. AGM batteries are heavier (together they weigh a little more than me), and you can only use half of their capacity before you start damaging their ability to hold a charge. That’s why we have 400 amp hours of batteries when our goal is 200 usable amp hours.
We went with AGM for one simple reason: price. Each of these AGM batteries cost around $350. A single 100 amp hour lithium battery costs $700. Plus, I specifically wanted two batteries for redundancy. If one catastrophically fails, I can quickly rewire the system to run solely off of the good battery. They have a two-year warranty, so replacing it won’t cost me anything, but it would still take time to receive a replacement, and I need to be able to work until I can receive and install it.
Perhaps in a few years, after I’ve saved a bunch of money by not paying rent, I can afford to upgrade to a pair of 100 amp hour lithium batteries. They’re definitely worth the money. I simply didn’t have it to spend when I built the van.
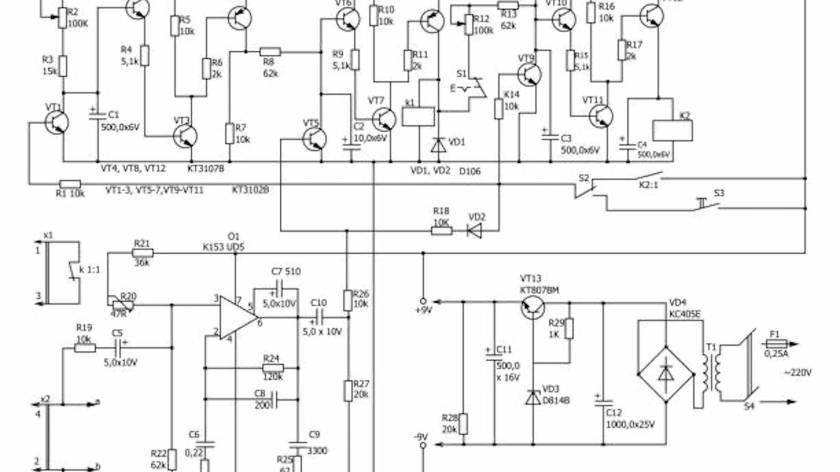
Battery Charger

This is the section where most people talk about their solar charge controller. I took a slightly different approach, with a Renogy DCC50S 50-amp MPPT charger. This is as simple as simple gets, which is why Vancity Vanlife has one. Chrome likes to keep things simple.
There are four terminals: power from your vehicle’s alternator, power from your solar panels, power to your house battery(ies), and a common ground. That’s it. There’s no mucking about with fancy settings or anything — the charger takes care of all that for you. Simply hook everything up, tell the charger what kind of battery you have (AGM, lithium, etc.), and away you go.
My van came with a fun little cheat code when it came to charging the house batteries off the alternator. It’s a former wheelchair van, and already had heavy gauge wiring running from the vehicle battery to the wheelchair lift. I really wanted to be able to charge off the alternator as well as solar panels because the wiring from the alternator was already installed. I just connected the power cable for the wheelchair lift to the charger, hooked up a ground, and boom, I was topping off the batteries long before installing the solar panels. This was good, because we began building the van during a cold New Hampshire winter. What little driving I did in the van, mainly runs to Home Depot for building supplies, was enough to top them off. The sealants required to mount solar panels on the roof don’t work in the cold, so we couldn’t install them until the spring anyway. Once we did install them, it was as simple as connecting the two wires to the charger, and boom, instant free electricity.
Why did I go with the more powerful 50-amp charger instead of the 30-amp version? If you do the math, 350 watts of solar power divided by 12 volts equals 29.1 amps, and the 30-amp charger would’ve worked perfectly for my current needs (pun fully intended). The 50-amp version normally sells for $299, while the 30-amp version is $259. For just $40 more, I can add a third solar panel by simply installing it on the roof and plugging it in. At that point, 525 watts divided by 12 volts equals 43.75 amps, well within the capacity of this charger.
The biggest disadvantage of this charger, as compared to a standard solar charge controller, is that it will only accept a 12-volt input. Many charge controllers will accept 24, 36, or 48 volts. This enables you to wire your solar panels in series rather than parallel, which increases the voltage but does not increase the amperage. As a result, the Renogy DCC50S is limited to 600 watts of solar input. Fortunately, based on my experience so far, this should be adequate for my needs.
Solar Panels

My basic design was based strongly on Will Prowse’s Classic 400 Watt Solar Package. That means 400 watts of solar panels charging 200 amp hours of lithium batteries (our 400 amp hour AGM batteries are the equivalent capacity).
My van has a fiberglass high-top roof. It’s too tall for roof racks, which means I had to use flexible solar panels instead of less expensive, more reliable rigid ones. This is a compromise, but I feel it’s worth it to gain the extra interior height in the van because at six feet tall, I am not short. I’d spotted a good deal on 200-watt flexible panels over the winter, but they were unavailable by the time started actually building the electrical system. When the fire happened and we were forced to install solar panels NOW, I bit the bullet and bought a pair of Renogy 175-watt flexible solar panels (even Renogy’s 200-watt panels were out of stock), for a total of 350 watts of maximum solar charging. And, like I said above, I designed enough capacity into my charging system to be able to add a third panel later, bringing the system up to 525 watts if I need it.
One thing I learned from Will Prowse is how important it is to not install flexible solar panels directly to the roof (like I did in my first van). Panels can generate a great deal of heat when they’re working hard. A van roof can also get quite hot in direct sunlight. Solar panels don’t turn sunlight into electricity nearly as well when they’re overheating. It’s important to let air circulate under the panels to help them stay cool. I’ve already described how I addressed this and installed the panels on the roof in another article.
Shore Power

In the beginning, we rarely spent any time at places with electrical hookups, so having a way to plug in our van was not a high priority for this build. I already do quite well between solar and alternator charging. That said, before van life, I already owned a small 4-amp charger to keep my motorcycle battery topped off during the six months of winter. It was fine for a 12 amp hour bike battery, but it’s just a slow drip of power into our 400 amp hour battery bank. Still, I already owned it, so it was “free” to install it in the van.
With the addition of my 100-foot extension cord and an adapter a friendly RVer gave us (thanks, Frank!) we did put this to good use during our two-week stay at Sumter Oaks RV Park while we got our Florida domicile sorted. We only got two hours of sunlight in the morning before the trees shaded the solar panels, and the only time we drove the van out of the park during our stay was for VIN verification when I registered it. It was a slow trickle, but it did maintain an adequate voltage in the battery, rather than let it drop down below danger level.
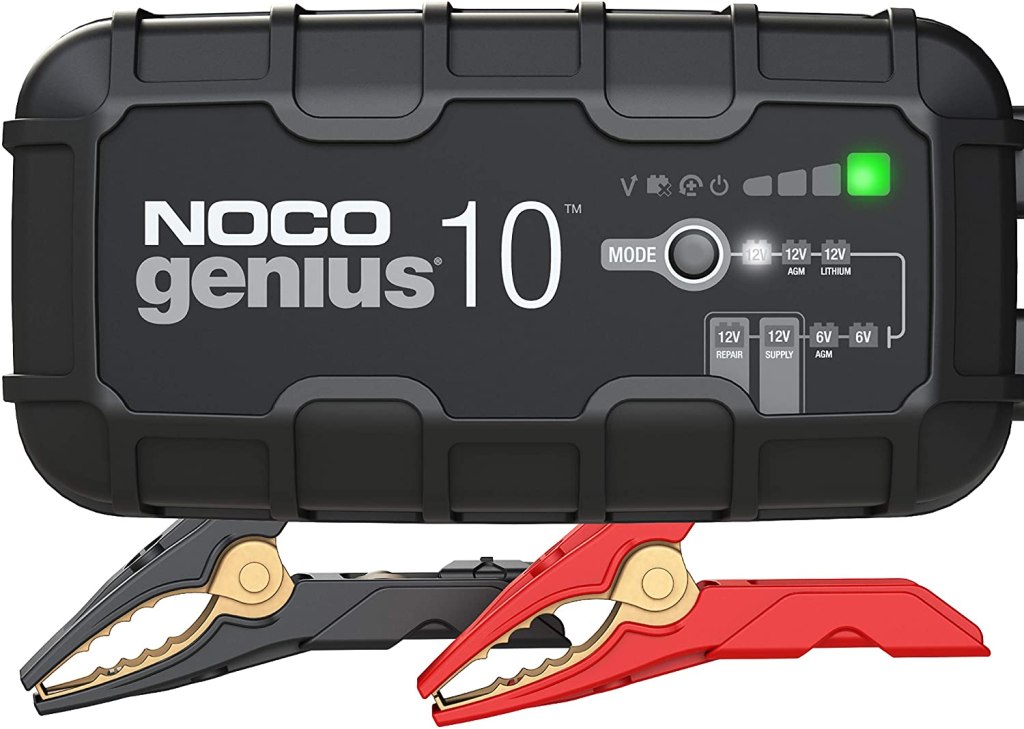
Things have changed. As I toured New England, I found myself staying with friends a lot, many of whom offered power hookups. At that point it was worth upgrading to a simple Noco 10-amp charger. More than a drop in the bucket, this would keep the batteries topped off even under heavy use.
Don’t let the alligator clips fool you. The cables bolt onto them, which means you can unbolt them and reveal ring terminals that you can permanently attach to your battery(ies). This is what I did.
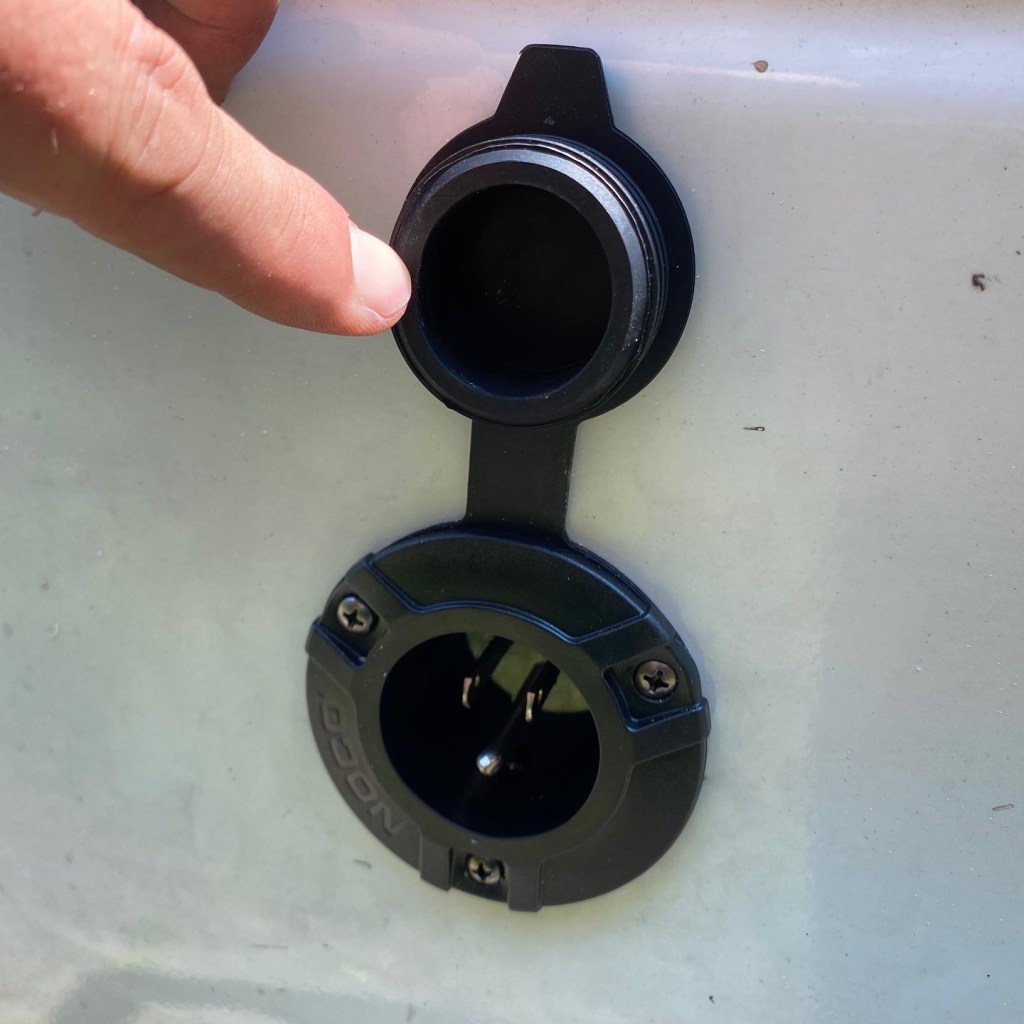
At the same time, I also ordered a Noco power socket. This installs into the side of the van, providing a permanent pass-through for 110VAC power from outside to inside, without running a cord through a door or window. It was super easy to install, though drilling a two-inch hole in the side of my van was a little bit stressful! I leave this plugged directly into the battery charger, already set up for 12-volt AGM batteries. When I plug the extension cord in, the charger turns on automatically and starts doing its thing. I also have a power strip that I can plug in and charge or run additional items if I want, but I don’t have many 110VAC items to run.
Power Inverter

Here’s an area where I go against the grain of conventional wisdom. I don’t have one! Okay, I did have a 300-watt inverter that plugs into a cigarette lighter outlet that I already owned before van life. That’s it. We rarely even used it. I didn’t even know it had died until I bought a Macbook Pro and tried plugging its AC adapter into the inverter while waiting for my 12-volt charger to arrive.
And that’s how I do it — I run exclusively on 12 volts. This means I do without luxuries like a coffee maker or microwave oven. And do you know what? I rarely miss it. Sure, it would be nice to be able to nuke up some leftovers from time to time, but I’ve learned to either heat them up on the stove or eat them cold. The same goes for coffee. I WILL NOT give it up, so I boil some water on the stove and use a combination French press/travel mug to make it. It’s fine.
I realize that not everyone is willing to forego the niceties of accessories that you normally plug into your house. And that’s fine! Even the great Bob Wells himself will absolutely not live without his microwave oven. But for me, the tiny 200-watt inverter built into my Jackery 240 does just fine for pretty much any random 110VAC need I might have on occasion.
Fuse Block

Any sticks-and-bricks house has a breaker box for overload protection, and your home on wheels should be no exception. I used a Kohree 12-way 12-volt fuse block as the hub of my house electrical system. Since the alternator and solar charging systems already use a common chassis ground, I grounded everything else to the chassis as well, meaning that I only need to run a power wire to each device and a short ground to the body from it.
I can run up to 12 separate circuits. I’m currently using nine of them, leaving me a little room to expand in the future. I also color-coded the wiring to correspond to whatever circuit it’s on, so that I can tell at a glance what I’m looking at. My wiring legend is as follows:
- Yellow: Built-in interior lights (I liberated some of the dome lights that came in the van for my own purposes. Also runs the reading lights above the bed. It was going to be for the dome light there, but now the reading lights are mounted to it, so I reused the wiring. This circuit also runs the porch lights, one of which came with the van and failed before I added my own and reused that wiring as well.)
- Orange: LED strip lights (intentionally on a separate circuit than my other lighting so that at least some lights should always work)
- Blue: Refrigerator/freezer outlet (this one’s important and gets its own circuit)
- Purple: 12-volt/USB outlets toward the front of the van
- Dark Green: 12-volt/USB outlets toward the rear of the van (again, redundancy — if one circuit fails I can still charge and run accesories)
- Light Green: Maxxair roof vent/fan
- Brown: Composting toilet ventilation fan (yes, I really used poop-colored wire for this)
- Red: Ham radios (one fuse for the VHF/UHF radio, one fuse for the HF radio — the power wiring they come with is already red, so I stuck to their color scheme)
- Black: Ground
How’s It Working?
In a word, excellent. During our stay in Gainesville, we lived our worst-case scenario of no driving, solar, or shore power. It took three days for the batteries to reach critical levels, just as we had hoped and expected. I simply ran the engine for a little while to charge them back up until we hit the road again. As long as I get some sun and/or driving every couple of days, it was enough power for both of our needs. Now that I’m traveling alone, I should be able to last four to five days since her laptop and other devices are no longer here.
I’ve had to make a few minor repairs and improvements. For example, the three-outlet splitter that I installed under the front passenger seat failed after only a couple of months. I replaced it with a more heavy-duty outlet I picked up at a truck stop, which is working perfectly. I’ve had to re-crimp the ring terminal on the composting toilet power circuit. It took a couple of tries to get a solid solder joint when I spliced power wiring for the USB outlets by my head into the existing circuit after Trisha built that part of the counter cabinet. It was much harder to reach the existing wiring with the assembled counter in the way.
Overall, though, everything has worked exactly according to plan. That makes me quite happy. Not only do my lights, fridge, and radios work, my laptop and hotspots also have consistent power, which means I can continue to work and maintain this way of life.
